Feeds:
Posts
Comments

Posts Tagged ‘Ample Scientific’

Brown Rot is a serious disease for peach trees.  This disease is caused by fungus, Monilinia fructicola.  The M. fructicola can infect flowers, shoots, fruits and branches.  Typical disease symptoms induced by M. fructicola include blossom and twig blight, cankers, and a fruit rot.   Brown rot on the peach typically develops rapid brown necrosis.  Under favored condition, the entire fruits can be rotten within 48 hours of infection. 

M. fructicola over winters in dried infected fruit called peach mummies or in infected branch cankers.  Mummies can either remain on tree or scatterd on ground.  Both may produce spores which infect blossoms and young fruit in the spring.  There are wo types of spore: ascospores and conidia. Ascospores are produced from apothecia, a mushroom-like structure that occurs only on mummies which have fallen to the ground and are partially covered with soil. Conidia are produced in abundance on mummies and infected twigs and may be spread by wind and rain. 

Here at Georgia, nicknamed peach state, brown rot is the serious disease for commercial peach orchard.  The peach tree in my backyard is not immuned from the disease.  There are beautiful peach blossom during the spring but what follows is the ugly brown rot and fruit droppings all over the ground. 
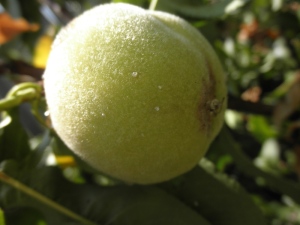
Peach insect bites

The symptoms on the fruits seems to start from a small insect bite where a small brown dot and clear gel like dischrage is clearly visible.

Brown Rot and Fruit Drop

The brown rot was spread to half of the fruit. There are fruits droppings every where on the ground.

peach mummy

A completely rotten peach is hanging on the tree. It is also called peach mummy.

Another peach mummy

I collected some peach infected by brown rot and slice a thin layer of skin.  Put it on my newly acquired Ample Scientific SM Plus stereo microscope with only the top light on. 

Healthy Peach Skin aT 20x

Healthy Peach Skin at 20x.

The skin of brown rot infested peach. The skin turned brown even without clearly visible mycelium.

Peach pulp and skin

Peach pulp and skin

Peach Pulp

The pulp of a peach infected by brown rot. Half of the pulp has already turned brown.

Monilinia fructicola Mycelium

The mycelium of Monilinia fructicola on a peach mummy.

A piece of peach mummy skin was sliced off and placed it in a vial with small amount of water. I gently scrap the surface with a dissecting tweezer, capped the vial and shacked for a few seconds.  A simple wet mount and malachite green stain was applied to the specimen.  The slide then observed at 400X with Nexcope CM701 compound microscope. 

Conidia of Monilinia fructicola

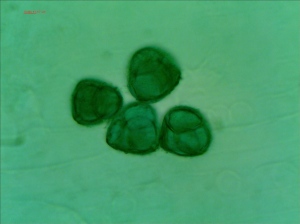
The pathogen that causes the peach brown rot. The picture is the conidia of Monilinia fructicola

two conidiospores formed on conidia (Monilinia fructicola)

Conidia of Monilinia fructicola

The specimens of conidia of Monilinia fructicola were stained with Malachite green.  Photos were taken with Tucsen 3.0MP CMOS microscope camera using Zeiss AxioVision 4.8 LE image capture software.  The eyepiece of the microscope was removed and replaced with Tucsen microscope camera adapter. 

Couple days after I left the rotten peach in door.  Rotten peach continued…

More web links about peach brown rot: 

University of Georgia Peach Handbook – Brown Rot

Cornell University Tree Fruit and Berry Pathology 

University of West Virginia KTFREC – Plant Disease Fact Sheet

Read Full Post »

The painted lady butterfly (Vanessa ssp.) is wildly distributed across most of the world, with the exception of South America.  It can often be seen in gardens and parks, feeding from cultivated flowers.  The painted lady is a large butterfly (wing span 5–9–cm (2–2 7/8 in)) identified by the black and white corners of its mainly deep orange, black-spotted wings. It has 5 white spots in the black forewing tips and while the orange areas may be pale here and there, there are no clean white dots in them. The American Lady Butterfly’s (Vanessa virginiensis) hindwings carry 2 eyespots on dorsal and ventral sides while the related species Painted Lady Butterfly (Vanessa cardui) has 4. Those on the dorsal side are black, but in the summer morph sometimes small blue pupils are present in some.

Painted Lady Butterfly vs American Lady Butterfly

Differences between painted lady butterfly and American lady butterfly - Courtesy of Kenneth Dwain Harrelson

American Painted Lady Butterfly (Vanessa virginiensis)

American Painted Lady Butterfly (Vanessa virginiensis)

 The painted lady butter that I collected last weekend is an American Painted Lady rather than Painted Lady because it has two eye marks rather than four eye marks on the hingwing.

American Painted Lady Butterfly Head Side View

American Painted Lady Butterfly Head Side View

American Painted Lady Butterfly Head Top View

American Painted Lady Butterfly Head Top View

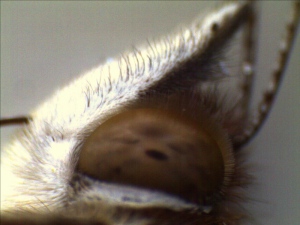
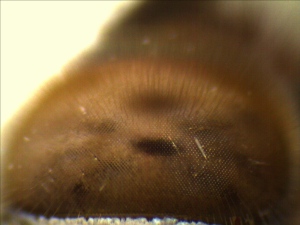
Eye of American Painted Lady Butterfly

Eye of American Painted Lady Butterfly

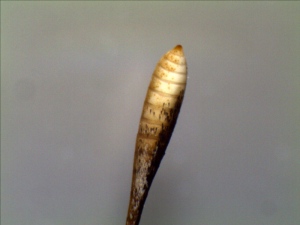
Antenna of American Painted Lady Butterfly

Antenna of American Painted Lady Butterfly

The Front Edge of the Wing

The scales of the red mark on the wing

The scales of the red mark on the wing

The scales and vein of the red mark on the wing

The scales and vein of the red mark on the wing

The scales of the "eye mark" of the wing

The scales of the "eye mark" of the wing

The inner edge of the wing showing the scales and the hair

Dense Hair on the Interior Edge of the Wing

Dense Hair on the Interior Edge of the Wing

Hairs on the thorax and Leg

Hairs on the thorax and Leg

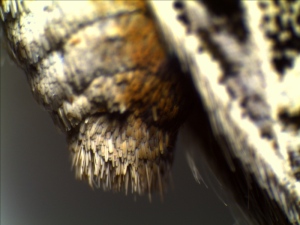
End of Abdomen

End of Abdomen

Mouth Part

Mouth Part

Leg

Leg

Photos are taken with Tuscen 3.0 MP CMOS microscope camera through the eyepiece of Ample Scientific SM Plus Stereo Microscope.  The amplificion is either 20 x or 40x.

Read Full Post »

It’s summer.  You can hear cricket chirping when you sit in your backyard listen to the surronding quietly.  The kids are in the summer break.  It’s perfect time to take kids to go on the fields to collect some insects and bring home for observation.

What we brought with us:

Inect collection net and collection container

Megan was carrying an insect collection net and container

If you plan to preserve the specimen, a killing jar is better than the collection container that Megan took with her.  She like to oberve them moving around so a collection container working just fine.  The contain has a small opening allow you to put insects but more difficult for insects to get out.

Small tubes or Vials

Small tubes or Vials allows you to put small insects, such as leaf hopper, ants or flies.

Triangle Envelope

Triangle Envelope made by semi-transparent paper. You can put butterfly in the envelope to prevent it damage the wing while trying to escape.

Of course, it is hot and humid during the summer.  Don’t forget to bring sun cream, hat and plenty of water.

Insect collection net is the essential tool for collecting insect. The perfect method is the draw a number eight horizontally with the net’s opening pointing to the direction of moving direction. Let the net move through the area that you want to collect. Megan was on the first insect collection field trip. She is getting better use of the net. She has an excellent close-out move that close up the net to prevent the insect from escaping.

Painted Lady Butterfly (Vanessa cardui)

Painted Lady Butterfly (Vanessa cardui)

a Grasshopper

a Grasshopper (It was molted right after we brought it home)

After we brought them home, we wanted to seem them in details.  A stereo microscope (or so-called low power microscope) is perfect for this purpose.

Stereo Microscope

Stereo Microscope is perfect microscope for observing insects.

In the picture is an Ample Scientific SM Plus Stereo Microscope. It equiped both top and bottom light. The observation surface is made of semi-reflectory mirrow which allows some top light to reflect from the bottom)

Butterfly Preservation

Butterfly Specimen Preparation

I made a simplified spreading board with styrophone with a central groove to allow the fat body to sit in.  I pinned the  butterfly through the middle of the thorax at the thickest part, slightly behind the base of the forewing then insert the pin into the center groove in the spreading board until the wings are level with the sides of the spreading board.  With the aid of an insect pin, adjust the front wing by gently pulling it forward, until the rear margin is at a right angle to the body of the butterfly. Pull the hind wing forward until the front margin is hidden beneath the front wing, and temporarily anchor it in the same manner as the front wing. Once the wings are in position, I placed strips of paper over the wings; anchor them firmly to the board.  Hopefully, the specimen will be ready in a week for display.

Read Full Post »

As I googled around the internet, I found many pollen pictures are in stained hydrated form.  Out of curiosity, I wanted to compared my collection with what I found on the internet and my previous pollen photos.  I collected some more flowers and pollens from air as well.  The complete project can be found under project pages.

Pine Pollens

Pine Pollen at 400X in dry form

Pine Pollen at 400X in dry form (very unique micky mouse form)

Pine at 400X Stained with Malachite Green

Pine pollen in hydrated state at 400X Stained with Malachite Green

Oak Pollens

Oak Pollens in dry state at 400X

Oak Pollens in dry state at 400X

Oak Pollen in hydrated state at 400X stained with Malachite Green

Oak Pollen in hydrated state at 400X stained with Malachite Green (As the oak pollens are hydrated, they become rounded and completely different from their dry form)

Apple pollens

Apple Pollen in dry form at 400X

Apple Pollen in dry form at 400X

Apple pollen in hydrate form at 400X (stainded by Malachite_Green)

Apple pollen in hydrate form at 400X (stainded by Malachite_Green)

Apple Blossom

Apple Blossom

Azalea Pollens


Azalea pollen in dry from at 400X

Azalea pollen in dry from at 400X

Azalea pollens stained by Malachite Green in hydrate

Azalea pollens stained by Malachite Green in hydrate

Azalea

Azalea

Pollens at low power (40X)

Pollens collected and observed at low power at 40X - They are peaked a few days ago.

 Stacked Photos

Pine pollen in dry form stacked

Pine pollen in dry form stacked

Oak Pollen in Dry Form Stacked

Oak Pollen in Dry Form Stacked

Apple Pollen in Dry Form Stacked

Apple Pollen in Dry Form Stacked

Pictures are taken with Tucsen TCA-3.0C CMOS Microscope Camera from Nexcope CM701 microscope with the eyepiece removed and replaced with Tucsen relay lens.

Pollen collection kit

You don't need much to observe pollen under microscope. If you already have a microscope and slides, just run by the pet store and drug store to get those.

Read Full Post »

Mid April is the most trouble time for allergy sufferers  (I am being one of them) in the deep south.  The pollen count just hit 5,722 this Tuesday according to Atlanta Allergy and Asthema Clinic.  Thursday’s rain helped a lot.  It was a pretty sight – yellow creeks everywhere and water paddle become pollen pond.  The yellow staff that we see on the ground are not serious allergen.  They are mainly pine pollens.  They are heavy and quickly drop to the ground.  Other lighter pollens are easily airborned.  They are more serious allergens, such as oak and birch.  I went out to to collect some pollens from the trees yesterday.  I shacked the pollens from the stalk onto the top of the slides.  My microscope does not come with a top light so I use a desk lamp to illuminate from the top. 

Pine pollen has a very funny mickey mouse shape appearance (Photo taken with Tucsen microscope camera from the eyepiece of Nexcope CM701 at 400x)

Oak Pollen at 400X

Birch Pollen at 400X

Arrh choo, even with mask on I was sneezing very hard last night…

Read Full Post »